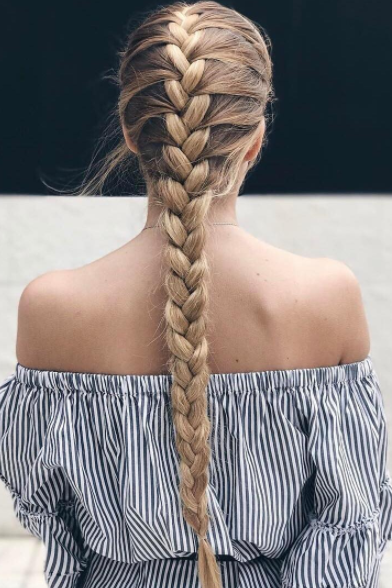
Different styles of French braids offer a lot of flexibility, whether you’re looking for a sleek, polished look or something more textured and undone.
Here are some of the most popular styles:
Table of Contents
Types of French Braid #1. Classic French Braid

The traditional three-strand overhand braid that starts at the crown and continues down the length of the hair.
Different French Braids Styles #2: Dutch Braid
Similar to a French braid but with an underhand technique, creating a more defined, raised braid.
French Braided Hairstyles #3. Side French Braid

A variation that starts at one side of the head and sweeps across for an asymmetrical look.
Different Styles of French Braids #4. Crown Braid (Halo Braid)
A French braid wrapped around the head to create a crown-like effect.
5. Fishtail French Braid
A combination of the fishtail technique and the French braid, giving a more intricate, woven appearance.
6. Waterfall Braid
A French braid that lets sections of hair drop out as you braid, creating a cascading effect.
7. Lace Braid
A French braid variation where you only add hair from one side, often used along the hairline for soft framing.
8. Double French Braids
Two parallel French braids, also known as boxer braids.
9. French Rope Braid
A twisted version of the French braid that uses two sections instead of three.
10. French Pull-Through Braid
A voluminous braid that mimics the French braid style but is created with ponytails instead of weaving.
Each of these styles can be adapted for different hair lengths and textures, and they work well for both casual and formal looks.
When it comes to hairstyling, few looks can match the timeless elegance and intricate charm of the French braid hairstyle.
This versatile hairstyle has graced the heads of countless individuals, from casual outings to red carpet events, with its ability to effortlessly blend sophistication and creativity.
Whether you’re a hair novice or a seasoned pro, mastering the art of the French braid opens up a world of possibilities.
In this blog post, I’ll delve into the history, step-by-step process, and variations of the French braid, all while subtly integrating some product recommendations to help you achieve that flawless finish.
READ ALSO: 5 Cold Weather Alcoholic Drinks to Try Today & More
The Tale of the French Braid Hairstyle: A Journey Through Time
The history of the French braid can be traced back centuries, with its origins rooted in the intricate braiding techniques of African and Native American cultures.
Over time, this style made its way to Europe and became synonymous with French elegance. The French braid’s enduring popularity can be attributed to its ability to cater to both formality and informality, making it a go-to choice for any occasion.
Mastering the Technique: Step-by-Step Guide to the French Braid Hairstyle
Step 1: Prep and Divide
Before diving into the French braid journey, ensure your hair is clean, detangled, and slightly damp. Divide your hair into three even sections at the crown of your head, just like you would for a regular braid.
Step 2: The Weaving Process Begins
Start by crossing the right section over the middle one, followed by the left section over the newly established middle. Here’s where the magic happens: each time you cross over, gather a small section of hair from the sides and add it to the outer strand before crossing it over the middle. This simple addition creates the iconic “waterfall” effect, giving your braid a mesmerizing look.
Photo Credits: POPSUGAR Photography | Anna Monette Roberts